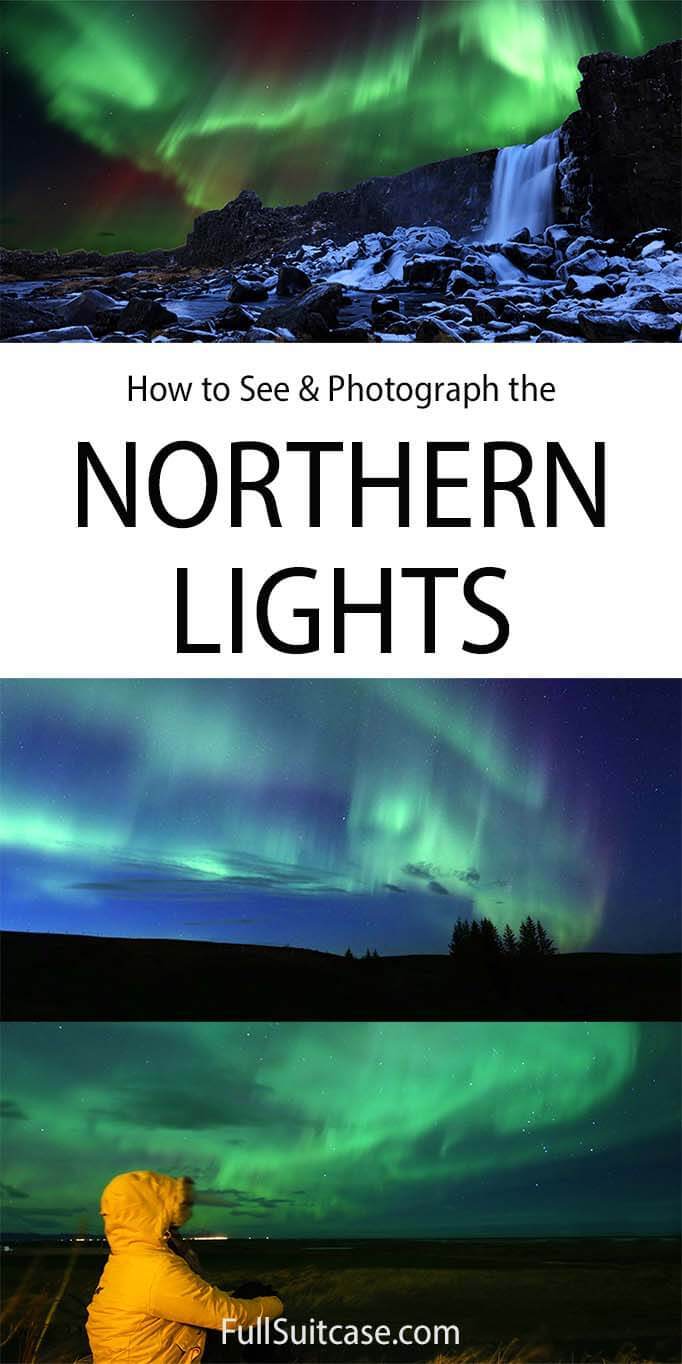
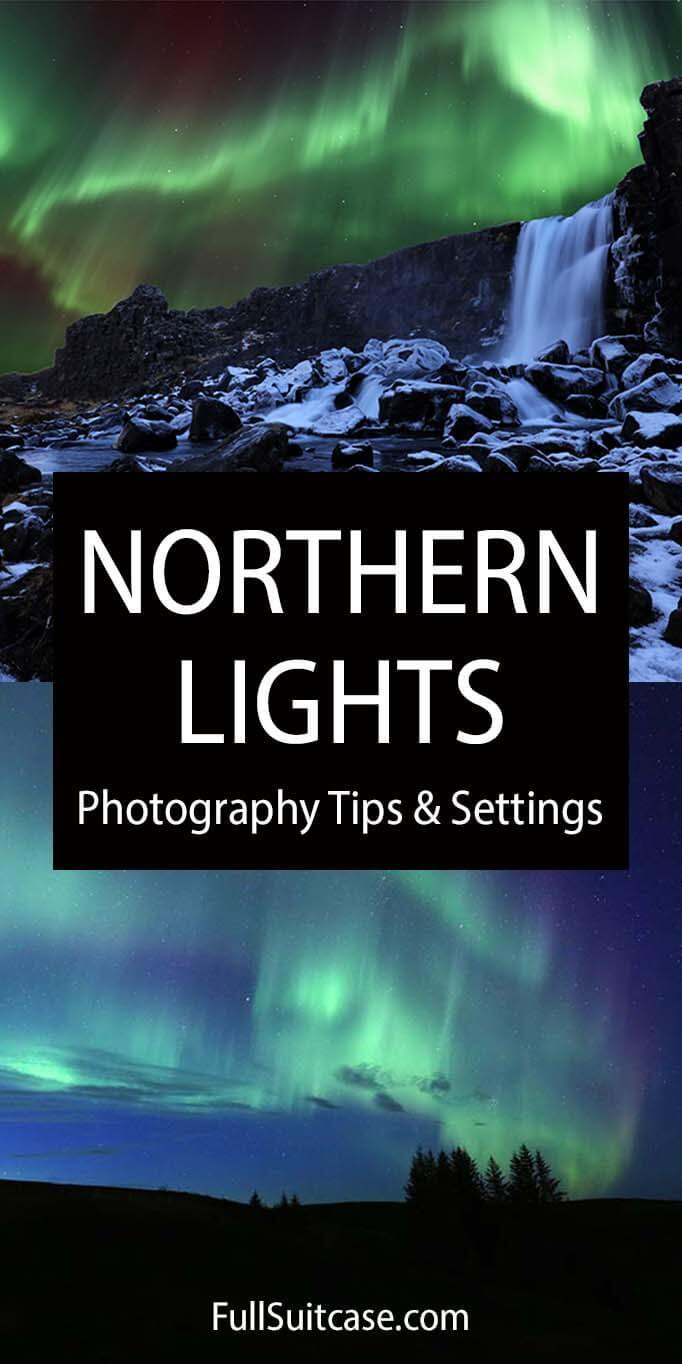
How to Photograph Northern Lights: Tips & Settings for Beginners

This site contains affiliate links, which means that we may earn a small commission, at no cost to you, for qualifying purchases. It supports the work that goes into keeping this content free. Thanks for reading! More info: Privacy Policy.
Planning to chase auroras this winter and wondering how to photograph the Northern Lights? This guide covers simple tips and basic camera settings to help you capture auroras, even if you’re a beginner.
Watching auroras dance across the sky is unforgettable, but photographing them can be tricky if you’ve never tried night photography before. The good news is that with a bit of preparation, you can take great photos without being a pro. And while “a real” camera will get you the best results, the truth is that today’s smartphones do a very good job too.
This introduction to Northern Lights photography is meant for beginners. Without getting overly technical, I share the basics and camera settings for aurora photography. So you can skip the trial and error and get some decent pictures for your vacation album or social media.
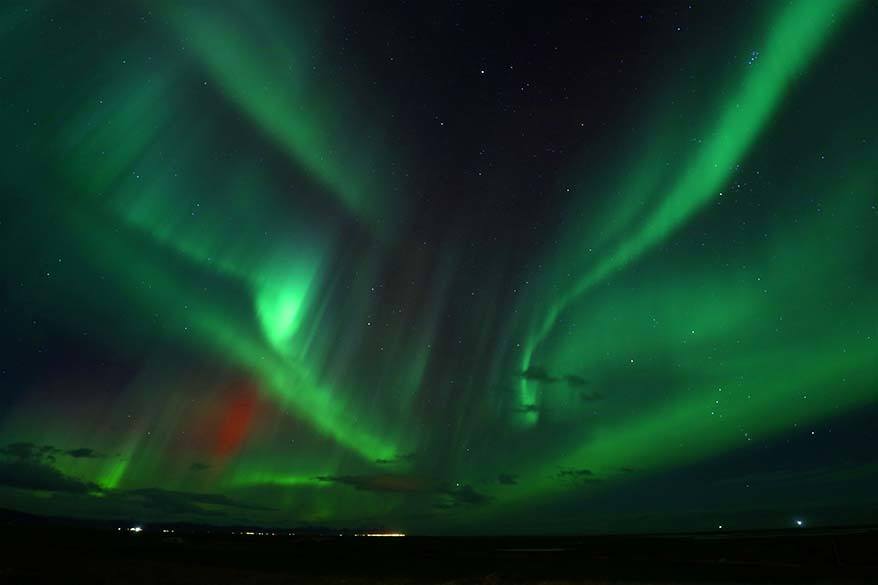
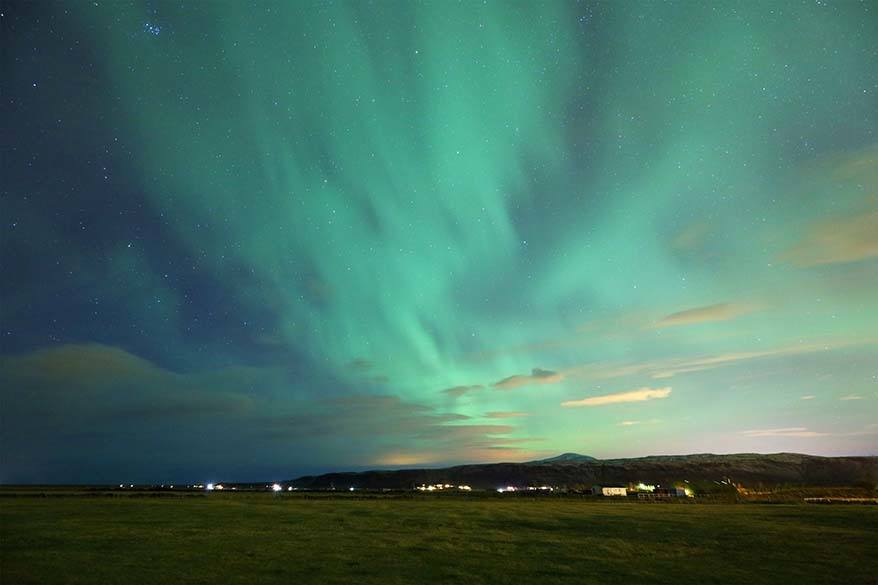
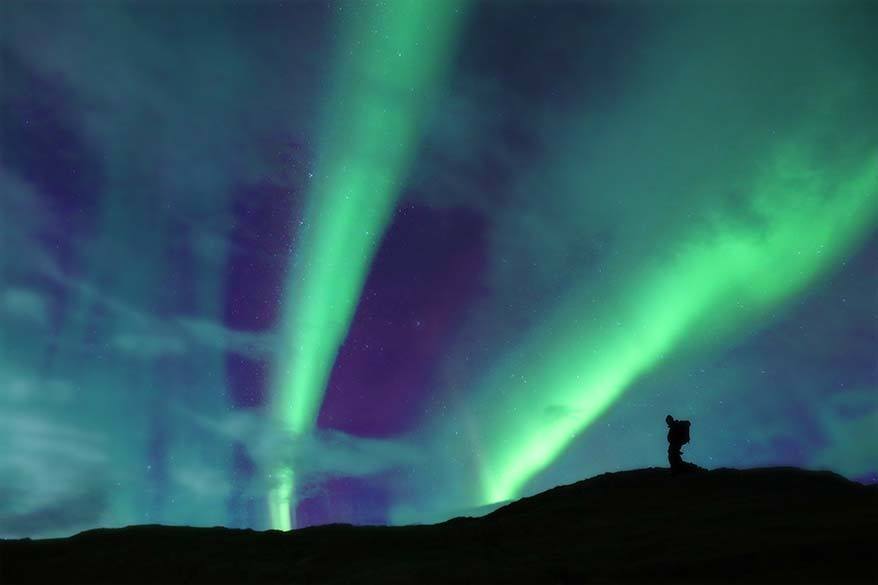
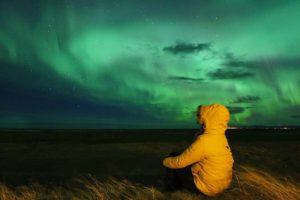
Good to know: All the photos in this article (except the smartphone shot) are from my very first attempt at aurora photography in Iceland in winter. I’ve included my camera settings under each picture.
Since then, I’ve seen the Northern Lights countless times, in Tromsø, Svalbard, Lapland, Iceland in September, and Alaska. If these trips taught me anything, it’s that you don’t need expensive gear – just the right approach. And remember: take a few pictures, then put the camera down and enjoy the show.
How to see and photograph the Northern Lights – OVERVIEW:
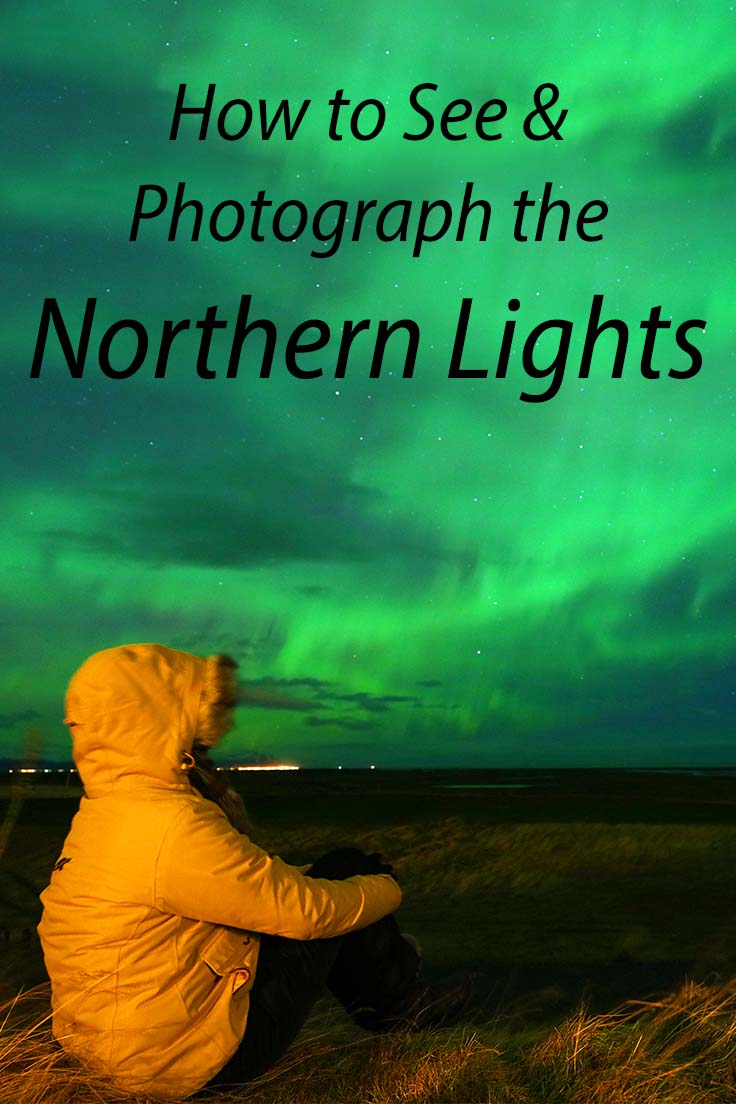
How to See the Northern Lights
Before we talk about camera settings and how to photograph the Northern Lights, here are some tips for how to see auroras. After all, if you don’t catch them, you can’t photograph them.
To spot auroras, you’ll need:
- The right location and season. The best places to see the Northern Lights include Iceland, Northern Norway, Finnish Lapland, Svalbard, Alaska, and Northern Canada. The season generally runs from September to March – early April, when nights are dark enough.
- Dark skies are essential for auroras to be visible. This is why you can’t see them in Arctic summer – it simply never gets dark.
- Clear skies. Clouds are the biggest obstacle, though strong auroras can sometimes shine through thin layers or gaps.
- Aurora activity (KP index). Measured on a scale of 0–9, where 0 means no activity, and anything above 4 is amazing. Even a forecast of 2–3 can produce nice displays, especially on camera. If you’re not sure whether you’re seeing aurora or clouds, take a picture – green means aurora, white means clouds. If it’s green, wait – often, the activity picks up and you can see them with a naked eye.
- Aurora Apps. Many websites and apps predict aurora activity, but they’re most useful for checking conditions on the night itself. Ask locals which sources they use, be ready to move for clearer skies, or book a guided tour – local guides know the best spots and conditions for that night.
- Persistence and luck. The Northern Lights are unpredictable. And even if they show up, you never know how long they’ll last. Go outside every night. Even with a low forecast, clear skies can surprise you, especially at the prime viewing locations right under the Aurora Oval, where even low solar activity can surprise you with an incredible show.
READ ALSO: Top Places to See Auroras Worldwide (+ Tips & Useful Info)
Camera Equipment for Northern Lights
Unless you are solely relying on your smartphone (in which case, see the next section), here is the basic camera equipment that you need for aurora photography:
- A camera that has manual mode functionality. Ideally, a full-frame DSLR or a mirrorless camera. Here are some recent models:
- Budget-Friendly: Canon EOS R100. Good for beginners.
- Mid-Range: OM System OM-D E-M10 Mark IV or Canon EOS R50. Ideal hobby photographers.
- Pair these cameras with a wide-angle lens (14mm–16mm) with a fast aperture (f1.8, f2.8 or maximum f4) to capture more light.
- A sturdy tripod to prevent camera shake during long exposures. I use and recommend Manfrotto tripods.
- A spare battery or two. Batteries tend to run low in very cold conditions, so keep the spares close to you (inside pocket is best).
- Quality memory cards that work well in cold conditions. I use SanDisk Extreme or Extreme Pro.
Can You Photograph Auroras with a Smartphone?
A few years ago, I would have said it was impossible to take good Northern Lights photos with a phone. Today, however, modern smartphones make it entirely doable. So the answer is yes!
With the latest models and their Night Mode features, you can capture surprisingly good aurora shots – more than enough for social media or your family album.
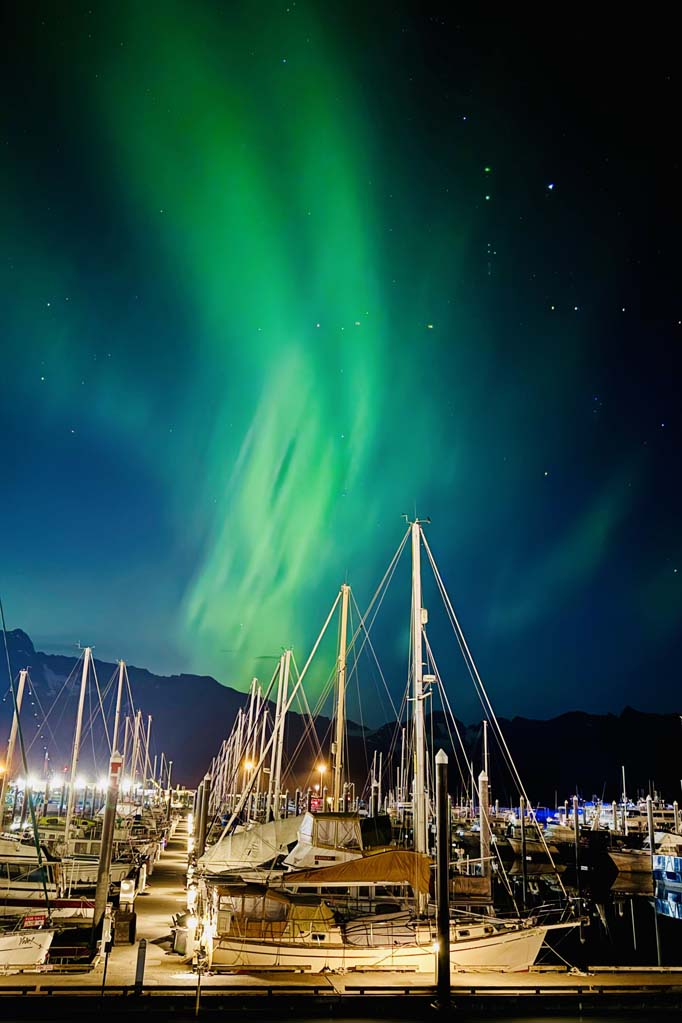
Of course, phone photos won’t match the quality of a proper camera, and they usually look best on small screens. Still, I’ve seen some impressive aurora shots taken on smartphones, and I recently captured a few myself. The photo below was taken with my iPhone right outside my hotel in Seward Harbor (light pollution and all) on a recent visit to Alaska in September.
Smartphone Camera Settings
Here are some basic settings for taking aurora pictures with your phone:
- Night Mode: Enable if available.
- Focus & Exposure: Lock both if your phone allows it.
- ISO: Moderate (around 800–1600) if adjustable.
- Shutter/Exposure Time: Use a few seconds to capture more light. For bright auroras, 3-4 seconds will be plenty, otherwise, experiment with slightly longer exposures and see what works best.
- Multiple Shots: Take several to find the best result.
PRO TIP: Use a sturdy phone tripod – any movement during long exposures will blur your shot. Also, don’t forget a power bank to keep your phone charged while shooting in cold conditions.
Best Camera Settings for Northern Lights Photography
Here are general camera settings that work in most situations for photographing the Northern Lights (you’ll need to adjust them depending on how bright or fast-moving the auroras are).
- Lens focus to infinity.
- Evaluative or matrix metering mode.
- Aperture at 2.8 or 4 (or the lowest number your lens can go).
- Exposure at 15 seconds for slower auroras and 10 seconds for faster ones. Adjust as needed.
- ISO at 1,600 to start with, adjust as needed.
- Custom white balance Kelvin value around 3,000, adjust if needed.
More info on the recommended camera settings for Northern Lights:
1. Set Your Camera Focus to Infinity
Focusing is often the hardest part of night photography. If your focus isn’t right, your photos won’t be sharp. Setting the focus to infinity means that your pictures will be sharp at the horizon.
It’s best to do this during the day or in your hotel room before you go outside. Select manual mode on your lens, focus to infinity, and adjust as needed. Mark the correct spot on your lens with a marker (silver sharpie works best) or tape for quick reference. When you’re outside at night, all you need to do is set your lens to the right position.
TIP: If you can’t do this in advance, focus on a bright distant point at night (like a house, lit road, or a flashlight spot). Once set, don’t adjust the lens – just reframe for the auroras and shoot.
2. Metering Mode
Use Evaluative Metering on Canon or Matrix Metering on Nikon. This ensures your camera measures light correctly for the scene. It’s not critical, but it helps get consistent exposures.
3. Wide Aperture
Set your camera to Manual Mode (M). Use the widest aperture your lens allows, for example, f/2.8. A wide aperture lets in more light, which is essential for night photography.
4. Exposure Time
This depends on the aurora activity, so you’ll have to experiment. Adjust based on movement and brightness and check your camera for results.
- Very bright auroras: sometimes even 1–2 seconds will work.
- For fast-moving auroras: 3–10 seconds.
- For slow-moving auroras: 12–20 seconds.
- For faint auroras: 20–25 seconds may be needed.
5. ISO Settings
Depending on how bright auroras are, you might need to adjust your camera’s ISO settings. Remember: the higher the ISO, the bigger the chance of ‘grain’ in your picture.
- ISO 1,600–3,200 for most situations.
- ISO 800 for very bright auroras.
6. White Balance
If you shoot in JPEG rather than RAW, getting colors right in-camera helps.
- Automatic White Balance is fine to start with.
- For more control, use Custom White Balance with Kelvin values 2,800–4,000 K.
READ ALSO: Simple Tips for Better Travel Photos
Practical Tips for Photographing Northern Lights
- Go outside and look for auroras. Don’t stay in bed hoping that the hotel staff will wake you up in time. Sometimes auroras last several minutes or even hours, but it can also be just a few seconds.
- Have your camera gear ready and set in advance. You don’t want to start playing with the camera settings if you only have one chance. If you are not ready, better put your camera aside and enjoy the spectacle. If it lasts long enough, you can still find the time to set it up and photograph the Northern Lights. But don’t miss watching them just trying to take a picture!
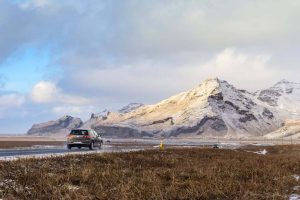
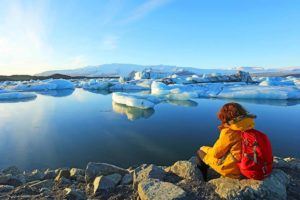
- If you have a car and there is a good chance for high aurora activity at night, consider driving to a scenic location. Your Northern Lights pictures will look so much nicer if there is a beautiful lake, a forest, a mountain, or a waterfall in the foreground.
What to Pack for Aurora Hunting
- Camera gear (as discussed above).
- Warm clothing. When spending hours outdoors in the Arctic in winter, you cannot dress too warm. In winter, you’ll need at least 4-5 layers, including thermal underwear and a really warm wind- and waterproof jacket. In September, you might be ok with just a sweater and a jacket…
- Two pairs of gloves. Warm outer gloves and thin thermal gloves that you can keep on when photographing Northern Lights. Consider hand warmers – I use rechargeable hand warmers and they work great!
- Warm shoes. Wear wool socks and insulated winter boots. I can’t stand having cold feet, so I also usually wear foot warmers – it helps a lot!
- Thermos. Fill it up with some warm tea before you leave the hotel – you’ll thank me later. On longer aurora hunts, you may also want to pack some snacks.
- Headlamp or a flashlight. A headlamp is useful if you need to adjust camera settings in the dark – it keeps your hands free. That said, any light can be very annoying for other photographers around you, so use it only if absolutely needed.
- A little chair or a blanket might be handy if you’re planning to spend hours outdoors.
READ ALSO: Iceland Winter Packing List & Norway Winter Packing List
See also our other articles to help you better prepare for your trip to Iceland or to Norway. In this guide, you can find some useful tips and information you should know before visiting Iceland in winter. Check it out!
TIP: Save this guide for later, share it with your friends, or pin it to Pinterest so you can easily come back to it when planning your trip.

Your article seems very easy for a novice like me. I’ll be in Norway in January and hope to have lots of chances to see the northern lights. I was thinking of getting a shutter cable. Do you it would be helpful??
Hi Dee, sure, it could be helpful if you want to avoid any kind of movement, but it’s not an absolute must. I personally never used a shutter cable.
Good luck!
Love your article and tips. My goal is to get a camera but for now my Samsung will do. I live in Nome Alaska and I have taken sharp and amazing photos on my Samsung camera. People think I photo shop the pictures but I did not. Red, green and other colors some pictures from my living room window others by walking into the tundra. It never gets old. My dream trip is to see the northern lights in Iceland.
Lucky you to see auroras at home where you live! I bet they are just as nice in Alaska as in Iceland, but there are plenty of other reasons to visit Iceland, for sure. 🙂
As for the camera, it’s more about the skill, the photographer, and practice, than a camera. So I can easily believe that you can get some great photos, especially if you have many opportunities to try.
Hope that your dream comes true and you get to see auroras in Iceland one day, Candy!
Great article! Thanks for all the helpful info!
Glad to help, Mark. Good luck with the aurora hunt and the pictures!
Hey,
Thanks for the great tips, really helped!! We had one great night!!! For me, I wished I had preprogrammed my camera with all the settings, especially the temperature! I believe I can do that. But I lost a lot of time setting it up, but we were lucky to have a bunch of time.
Glad to hear you could see and photograph the Northern Lights, Jared! It’s a special experience, isn’t it?
And yes, it’s definitely useful to set your camera ready before auroras show up so that you don’t have to play with the tripod or the initial settings too much. But aurora photography requires some tweaking and adjusting depending on the display you get, and so you can never have 100% perfect settings for every situation anyway. It sure helps if it’s a longer show and you can try things out and get some nice pictures.
Happy New Year and happy travels!
I am headed to Alaska..Denali in September. I am hoping to see the Northern Lights. Your camera settings and advice are really welcome. Also tips for for composition are very useful. I have another tip for your readers ,provided in an article I read..when using a headlamp or flashlight, make it red. It helps with night vision and other photographers will thank you.
Thanks for the tip, Carol. It can be useful when there are other people around, indeed. Have a great trip and hope you get to see the Northern Lights in Alaska!
Hey @Carol, we are planning to be in Alaska at Denali in mid September. Can you please suggest few places to visit in Denali for the Aurora.
Thank you in advance.
Nikita.
Thank you so much for these tips and for sharing all of your travel adventures. So helpful with our planning!
Glad to help, Melissa. Hope you get to see the Northern Lights!
I’d leave out the bit about metering mode. If you’re using manual settings and ‘experimenting’ then the metering mode you select is meaningless.
Thanks, Desmond. As I already said in the article, I’m not sure how important this is, so thanks for confirming that it doesn’t matter if people are indeed shooting in Manual mode.
I rarely comment on things on the internet, but your excellent, well-written article inspired me to do so.
I think you have simplified it well enough for me to take some photos of the NL…and then to experiment a bit once I am there. I really appreciate your efforts.
Now if I could just be sure that I am going to see them in Yellowknife in early March, then I will be all set!
Thanks again!
Thank you for taking the time to comment, Jamie. I’m glad that you found these aurora photography tips useful and fingers crossed you get to see the Northern Lights!
Enjoy your trip!
Hi Jurga,
Thank you so much for these tips. I read them just as we were about to go outside to look for auroras and thanks to your tips I took some really nice shots. Aurora was not very strong, but we saw it and the pictures will be great memories.
Hi Vita, glad to hear that! It’s an amazing experience, seeing the Northern Lights, isn’t it?!
Happy travels!
Hi Jurga! I’m a professional photographer and teacher who has never photographed the northern lights. My sister and mother are going to Norway this October, so I read your blog to find out how to photograph the lights. Your article is excellent! Well written, clear, concise, and accurate. Also, your photos are excellent, and thanks for the exposure info. Three observations: First, when a camera is set on manual exposure mode, matrix or evaluative metering does not function. Second, I recommend that flashlights and/or headlamps have a red lens or red filter to preserve night vision, if not for yourself, for others in your group! Lastly, I caution against drinking alcoholic beverages before or during cold expeditions.
Thanks for your tips, John. It’s funny that you say this about the metering modes not functioning in manual mode. I honestly wouldn’t know, but this was a tip I found several times when researching Northern Lights photography, recommended by serious photographers. So, I always assumed, they know what they were saying. 🙂 Anyway, I’ll see if I can update my post one of these days and correct this.
And yes, you are right about the lights disturbing the others, especially if you are photographing the lights when there are lots of other photographers around. Any additional light can be really disturbing.
Hi,
Wonderful article indeed! I am planning a 10 days trip to Iceland next year. I was looking to witness the greenary as well as the northern lights. From your article I think September would be the right time to choose. Can you help me choose the dates. Is it better to go in the starting of September or mid or towards the end of the month. Thanks in advance 🙂
Hi Mehrain, unless you are booking last minute and can base yourself on the weather forecast, it’s really impossible to say. For better weather, beginning of the month should generally be better. For the Northern Lights – end of the month, as that will give you more hours of darkness. But you never know, so just pick the dates that suit you best, and if you can’t decide, go right in the middle:)
If you haven’t seen it yet, please also check our article about visiting Iceland in September.
Thank you!! First post I’ve read that made sense in my non techy brain!! Now all we need is some activity to photograph! Fingers crossed….!
Haha, good to hear that, Debbie. That was exactly the intention of this post – to help people like myself to take some good shots of auroras. Fingers crossed you get to see them!
Thanks for the great info! However I will only have my cellphone to snap photos ? Is that possible?
If you are choosing the aperture, shutter sped and ISO then setting a metering mode is not required.
Is Canon mirror less M 50 camera ok?for Northern lights?How do you take videos of Northern lights?
Hi, any camera is ok as long as it has manual settings, just make sure you have a very wide lens as well.
I have no experience with filming the Northern Lights, so can’t help you there.
Hello, Juga,
I leave for Iceland in two weeks and as a novice photographer I was browsing the internet and found your site. I am so glad I did as my camera would have been set on auto. Occasionally in the evenings I will use a higher ISO but those two things are all I know of my csmera. I will have many opportunities to be outdoors and will use your suggestions. My husband did not want me using my Nikon but to use the new IPhone. I know it takes great photos but I’m not taking a chance. After all, what did I buy my Nikon for if not to drag around the world. Thank you again and I now have hope of some good aurora photos if conditions are right.
Hi Debbie, glad you found this info useful. Northern Lights photography isn’t simple indeed, so you definitely need a camera that handles manual settings and also a tripod – it’s a must!
I know that people use aurora photoraphy apps for iPhone and get somewhat ok-ish pictures of auroras, but usually they are blur and not really useable for anything more than to share on social media to show to your friends.
Fingers crossed you have good weather and high aurora activity! Enjoy your trip!
PS If you haven’t yet, feel free to join our Facebook group for Iceland and Scandinavia travel. We love to see pictures and hear about people’s travel experiences!
Thanks for sharing. Very useful tips that I can’t wait to try.
Glad you found this useful, Shayne. Good luck with chasing the Northern Lights!
Hello! For getting portraits(a person and the lights), if you have a good lens like you the one you described and all equipment, is an external flash necessary in your opinion? Thank you!
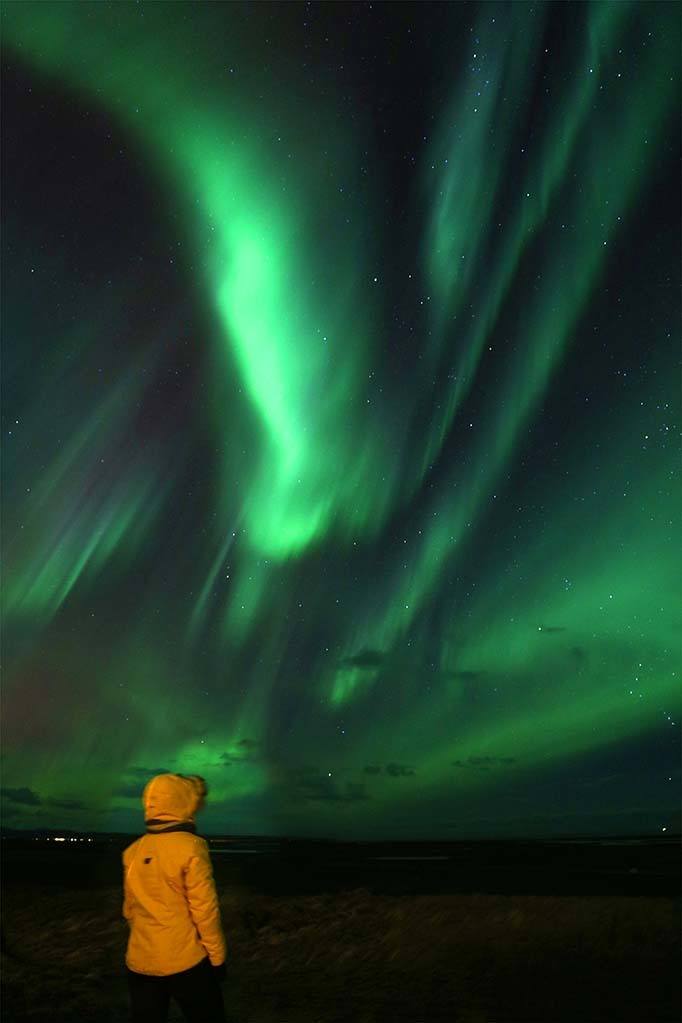
Hi Oscar, in order to take a really good picture of a person with the Northern Lights (like this one – you can find it in this post), you need an external light source.
The trick is to use it just for a split part of a second, so the person still looks ok (not overly exposed) while the shutter stays open longer to capture the Northern Lights themselves. Another trick is that the person should stand/sit completely still during the entire time when the shutter is open. Hope you understand what I mean?
That being said, I took a few pictures of myself with auroras (e.g. this one) and didn’t use any external light source (it would have been difficult to do it for myself anyway :)). I left the shutter open quite a long time and tried to sit very still during the entire time. I think those pictures turned out quite ok as well.
But yes, for nice portraits you need a good strong flash.
Hey Jurga! this post of yours have been of great help! i have been looking for ideal settings for quite sometime as I am traveling to Lapland next week!! Thank you so much for sharing! Hope the weather stays clear and I am able to see Aurora! Fingers crossed!
Glad you found this useful. Fingers crossed for the clear skies and hope you make some great pictures, Siddarth!
I’m going to Iceland next month and I’m a amateur photographer seeking advice on photographing the NL. I usually don’t post comments on blogs/website but I wanted for this one because it’s by far the best information and detail I’ve seen for preparing for photographing the NL!!! Thank you!
Thank you so much for this kind feedback. Northern Lights photography is no rocket science, but it requires some testing to see what works best and it depends so much on the conditions that you get. I always just start with the standard settings described in this post and then adjust the shutter speed and ISO as needed.
Have a great trip and hope you get some nice aurora shots!
Thanks for these detailed tips. Now lets hope we can see the northern lights!!!
Fingers crossed for you!
What a great post and beautiful photos. Thanks for all the practical photography tips, can’t wait to try it out!
Thank you, Amber. Fingers crossed you get to see the Northern Lights!
Hey!
Do you think that getting a GoPro 6 for iceland would be a smart idea? Not only for photographing the northern lights, but for other outdoor activities as well!
Thanks!
Hi Jackie, I really don’t know, I guess it depends on what other camera you have and also what kind of activities you’re planning. I didn’t take my GoPro to Iceland, never missed it. We use ours mainly for outdoor activities, but it’s so limited in what it can. Video quality is amazing and the size is a big advantage, but I’d never use it for pictures.
My friend took a GoPro one to photograph the Northern Lights when we travelled in November a few years back, and while she could take some time laps shots, she wasn’t really happy with the quality.
So it really depends on what you already have and what kind of photography/ video you are planning to shoot.
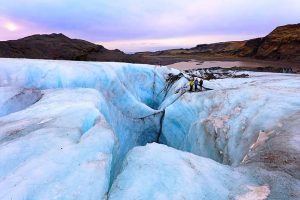
Hi Jurga. We’ll be going to Iceland in March. Your post is extremely helpful as we’re very very novice photographer. We’ve never own a nice camera before. Which camera did you use or what would you recommend? It would be nice if the camera can take good pictures of the aurora, waterfall and the icecave. We do have a budget and would love to get one under $1000. Your advice is greatly appreciated. Tina
Hi Tina, it’s really so difficult to advise as there are so many cameras on the market. Do you want a DSLR, mirrorless, or just simple point and shoot… If you are somewhat serious about photography, then in this budget consider DSLR, something like Canon EOS 60d or a smaller Canon EOS Rebel. And get a wide angle lens for Northern Lights and wide landscapes. For your budget you could get this Canon 10-18mm lens. And make sure to get a tripod for night photography. I love Manfrotto tripods, here is their budget model.
If you don’t like changing lenses, then there are many options like e.g. this Panasonic camera. I have no idea how it is for night photography like auroras though, but I heard from many people that it’s a nice versatile camera.
As I said, there are thousands of choices, but here are some suggestions that hopefully will get you started.
is it possible getting pictures with an iphone
Honestly – it’s really difficult to get any decent pictures of the Northern Lights on your phone. Even if you know the settings and your phone has a good camera, you still have to able to keep it very still for a few seconds. If you are lucky to see very bright auroras you will probably be able to photograph some unsharp greenish sky, but if you want good pictures you really need a good camera and a tripod. And even then it’s not easy for the first time.
There are apps for phones that will work, Try “Slow Shutter” this app can be purchased for $2 U.S. You will need a tripod and a holder for the phone. This app allows the phone to be set with a time exposure and you are also able to adjust the ISO. Since the aperture is fixed you just need to get the right ISO and shutter speed combo correct for a nice photo.
Thanks for sharing this Jim. I’d really be curious to see how those pictures look like. I’m just back from a wonderful winter trip in Tromso Norway and nobody who was using the phone (various apps) got any decent shots of auroras. Even with smaller simple cameras it’s really difficult, even though we got a really nice and quite strong aurora show that went on for several hours giving everyone plenty of time to practice photography.
There is a 99 cents app for the iPhone (Northern Lights Photo Taker by Lazily Inspired) that take half way decent pictures. Not the great pictures you get with DSLR, but enough to document your sighting.
Thanks for sharing this, Victor. Might be useful to many readers.
Thanks for such a detailed post. This will be so useful when we set on a journey to see the northern lights, one day 😀 Pinned on Pinterest for future reference! 🙂
Thanks for taking the time to leave a comment, Kristina. Appreciate it!
Love your pictures and tips. Seeing the Northern Lights is near the top of my bucket list but I’ve never thought about the practical aspect of night photography – which is so relevant.
I guess you’re right, Sara. Usually we don’t think about the practical side of photography in certain circumstances before we actually try to take a picture and realise that it won’t work with a simple push of a button. At least now you know where to start when you find yourself in such situation, right? 😉
Thanks for the tips, Jurga. Your post was just in time for our trip to Iceland last week. We saw auroras! They were everything we expected them to be. Tried taking several pictures using your tips here, but with the camera equipment we had they didn’t turn out as nice as yours. Note to self: get a better camera for future trips. Anyway just wanted to let you know.
Glad to hear you saw the Northern Lights, Paul. It’s the experience that counts at the end and not the pictures. But indeed good camera equipment is essential for some types of photography. Thanks for taking the time to leave a comment.
I read this with interest and I really hope one day I will get to use your advice! I never knew that about batteries and the cold!
This is great! I’ve always wondered how to do this even though we haven’t been able to travel for the Northern Lights yet. The only other thing I’d recommend if possible is a remote for the camera. My husband LOVES have a remote so you don’t have to touch the camera 🙂
That’s a good tip indeed, Jessica. I bought a remote for my camera too and it’s the best 20$ investment ever 🙂
This is so helpful – thank you! I’m still learning how to use the settings on my camera and I love having quick-reference guides without having to fluff around forever getting things ‘just right’ – half the time I miss the shot in doing so! Filing this away as I’d love to get to Iceland either this winter or next.
Great article. I was lucky to see it once in my own country the netherlands during unusual high activity. So beautiful.
The Netherlands? Really? Let me know next time – I might jump in the car and come over. 😉
There are some awesome tips in this post, thanks! I’ve seen the Northern Lights countless times in Norway, Canada and Alaska, but I always left the photography part to someone else. I might try it next time though 🙂
Lucky you! The more practice you get with photography, the easier it will be, so I’d say definitely give it a try next time!
Thank you for all these tips!! I’m originally from Canada and have only been able to enjoy them, not photograph them. Now I know the right kind of camera and settings I need for my next trip back. I suppose I’ll also need a new coat…
There is always a good excuse to go shopping, Leslie, whether it’s a new camera or a jacket. 😉 Thanks for taking the time to leave a comment!
Great post about how to photograph the northern lights. I love that you indicated which camera functions you used under each picture and I found where you described the settings you’d need for the northern lights very useful. Got this post saved for when I (hopefully!) visit Iceland one day!
I’m so glad you posted this! Myself and my friend are travelling to Tromsø in February and hope to catch the aurora. I take photos all the time during the day but was a little unsure how to shoot at night and get good results. This post has helped so much and actually makes me realise it’s not as hard to set my DSLR up for it as I thought it would be.
Thanks for your feedback, Corinne. I hope you’ll see some spectacular auroras in Norway! These tips are indeed meant for complete beginners who never photographed Northern Lights before. Just set the camera to suggested settings and you have a starting point from which to adjust if needed.
What a great post and beautiful photos. I have been wanting to know how to use my SLR for taking night pictures better. Thanks for the tips they were great.
Glad you found it useful, Melissa. Looking forward to seeing some night photography on your blog. 😉
Brilliant article Jurga! The photographs are beautiful! I need to book that trip to Iceland! Pinned for later so I will know what to do to get the shots! Thank you! Ps adding a new camera to my Xmas list!!
Thank you Tracy. Any excuse is good to get a good camera, isn’t it? 😉
Hi Jurga!
So me and my partner are off to iceland in a few days. We are doing the ring road. (after a lot of research). I just wanted to ask your opinion on the tours for the northern lights.
We have a car but are abit concerned about hunting for them at night ourselves. how does one know where to go? also since we are doing it in winter we are skeptical about driving at night ourselves. Do you think we should join a tour for the northern lights instead?
How do you hunt for them on your own?
Thank you Jurga! this is my dream!
Hi Naina, we didn’t go anywhere special just kept an eye on the aurora forecast and spent lots of time outside waiting. When the forecast was good (aurora activity of at least 2-3) and the sky was clear at the location where we were, we went outside. All the Northern Lights we saw was just outside our hotels.
If you have a car, you could drive to some nice place nearby if the aurora forecast is really good and you want a nice foreground for your pictures. Otherwise just go outside at your hotel. Some hotels even provide aurora wake-up service, so if they see a really strong aurora at night they can come and knock on your door if you ask for it. But sometimes auroras are quickly gone, so you have to be ready quickly :). In general, you don’t need any tour if you are already outside of the city. If the auroras are strong you will see them no matter where you are.
Good luck and enjoy your trip!